
Install and activate
1
Download Youka Live
Open the Youka Live download page and
download the Universal DMG.
2
Install the app
Open the DMG, drag Youka Live into Applications, eject the disk
image, and open Youka Live.
3
Activate this Mac
The Set Up Youka Live window opens automatically. Under Computer
Activation, select Continue in Browser. Your browser opens for sign-in
or account creation; approve this Mac, then select Return to Youka Live
to continue in the setup window.By selecting Continue in Browser, you agree to the Terms of Use and
acknowledge the Privacy Policy linked in the setup window.Approval gives your Youka account 30 cumulative minutes of Live separation.
The allowance has no calendar expiration and no payment card is required.
Time decreases only after the app reaches Live; setup, warm-up, recovery,
errors, and time with Live switched off do not count.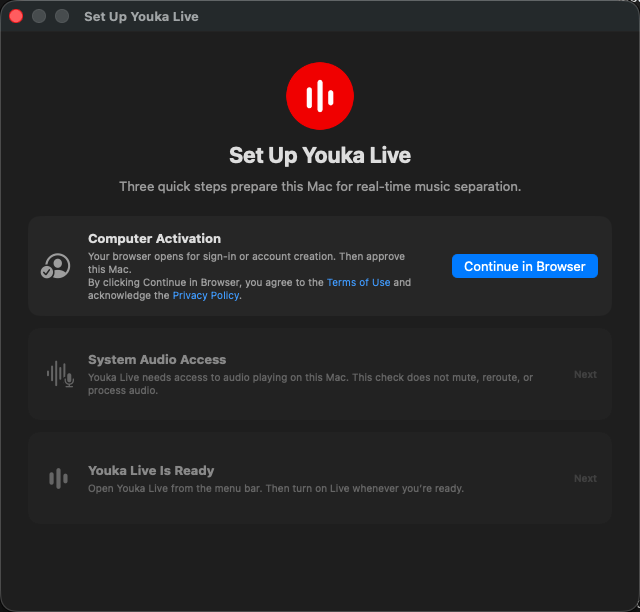
4
Enable system audio
Back in setup, select Enable System Audio, then choose Allow in the
macOS prompt. This permission check does not mute, reroute, or process audio.If access is not granted, select Open System Settings, enable Youka Live
under Privacy & Security → Screen & System Audio Recording, return to
setup, and select Check Again.
5
Open Youka Live
When both earlier steps are complete, select Open Youka Live. The setup
window closes and the mixer opens from the waveform icon in the macOS menu
bar. On later launches, setup stays complete; click the waveform icon to
open the mixer.If a Privacy section appears in your region, choose whether to share
usage and reliability data. Your audio is never included, and you can change
this choice later in Settings.
Make your first mix
1
Start playback
Play music or video in any Mac app, such as a browser or media player.
2
Turn on Live
Enable Live from the Youka Live menu. As soon as Youka Live takes
control of system audio, the original sound becomes silent. This is
expected: yellow Checking runs a short internal reliability test.
If no source audio is playing afterward, the app becomes green Ready.
When audio arrives, blue Buffering collects the synchronized separated
lead before sound reaches your speakers.Keep the music or video playing and allow a few seconds for Buffering to
become green Live. Trial time starts only after separated audio is
playing; Checking, Ready, and Buffering do not count.
3
Adjust the stems
Move the Vocals, Drums, Bass, and Other sliders, or adjust
Master to change the full output level. Select any speaker control,
including Master, to mute it. Unmuting restores its previous audible
level.To keep the mixer compact, open … → Show in Mixer and turn off any
controls you do not want to see. Hidden controls keep their volume and mute
settings. Select Show All to restore every control.